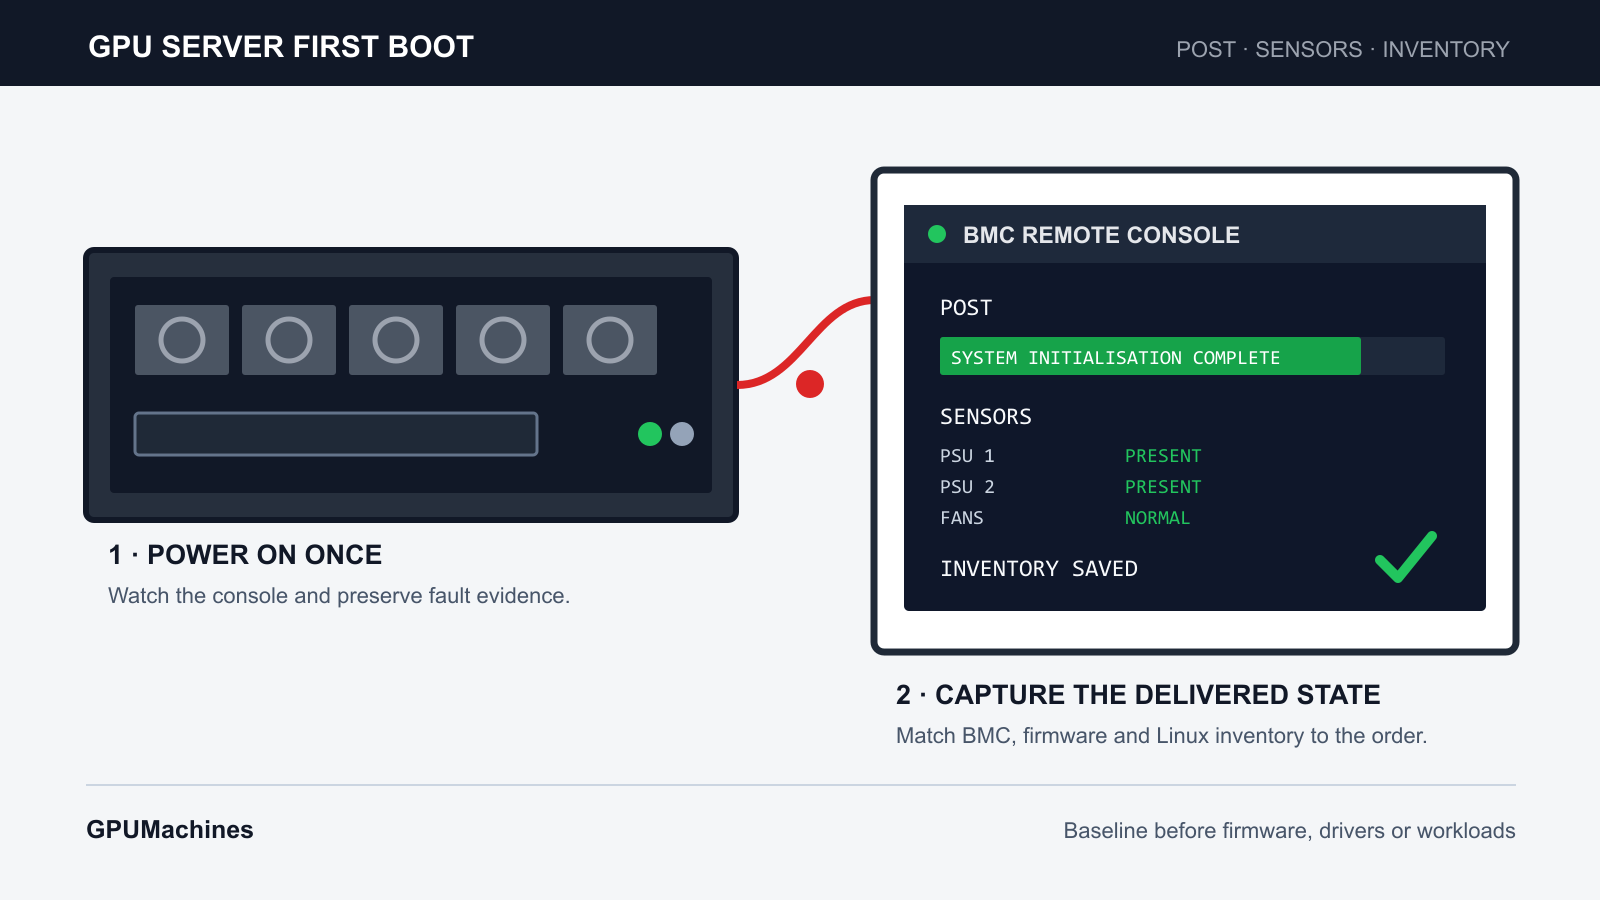
Pressing the power button is the easy part. The useful outcome of a first boot is a timestamped record showing that the delivered GPU server completed POST, reported sane sensor states and exposed the hardware that was actually ordered.
Treat first boot as an acceptance test, not a race to install CUDA. If a GPU, DIMM, drive, network adapter or power supply is missing, this is the cleanest point at which to find it. The machine has not yet accumulated driver changes, application packages or workload faults that can muddy the evidence.
This guide starts after the physical receiving check. If the shipment has not yet been inspected, complete the GPU server delivery checklist first. The model-specific installation manual and the supplier's support process take precedence throughout.
The short answer: what should first boot prove?
A useful first-boot record proves six things:
1. the chassis reaches a stable powered state without an unresolved fault indicator; 2. POST completes, or any failure code is captured before further changes are made; 3. the BMC sees the expected power supplies, fans, processors, memory, storage and PCIe devices; 4. temperatures, voltages and fan readings are reported without a critical active event; 5. the operating system sees the expected CPU, memory, block devices, NICs and GPU-class PCIe devices; 6. the evidence is saved against the chassis serial number and planned hostname.
Enumeration is not proof of performance or long-term health. A GPU can appear on the PCIe bus and still fail a later diagnostic. First boot gives you a trustworthy starting point for firmware work, driver installation and stress testing.
Define the pass criteria before powering on
Write down what the server should contain. Use the purchase order, supplier build sheet, platform manual and the delivery record rather than memory.
The expected-hardware sheet should cover:
- chassis model and serial number;
- CPU model and socket count;
- total memory and expected DIMM population;
- local boot and data drives, including capacity and interface;
- GPU model and count;
- high-speed NIC and management NIC models;
- power-supply count and redundancy arrangement;
- installed risers, switches or fabric modules where the platform exposes them;
- the intended rack position, hostname and management address.
Record tolerances as well as exact values. Firmware may report usable memory slightly differently from the sum printed on DIMM labels, and storage tools may show decimal or binary capacity units. A small unit difference is not a missing device. A whole absent DIMM, drive or GPU is.
For an HGX server, include the expected GPU baseboard and switch fabric. For a configurable PCIe GPU server, keep the slot map beside the checklist because bus addresses alone do not tell you whether a card occupies the planned CPU root complex.
Establish BMC access before host power
The baseboard management controller normally starts while the host remains off. Use that period to create the first snapshot.
Connect the dedicated management port only to the approved management network. Do not expose a new BMC directly to the public internet or a general user LAN. Change default credentials through the vendor's documented first-boot process, create named administrative access where policy requires it, and record the BMC address in the asset system rather than in the article evidence folder.
Open the remote console before host power. A KVM or serial-over-LAN session gives you the POST screen even when the rack has no local monitor. Check that the console works while there is still time to resolve browser, certificate, JavaScript or network-access issues.
Before pressing power, save or photograph:
- the BMC dashboard and current chassis power state;
- model, serial and FRU identity;
- BMC and system firmware versions shown by the interface;
- detected power supplies and their status;
- current sensor page;
- the system event log and POST-code log, if present.
Do not clear logs merely to make the dashboard look tidy. Export the original entries first. Some events may have been created during factory test, transport or installation; the timestamp and sequence matter when support needs to decide whether a fault predates your first boot.
Sensors for host-powered components may read unavailable while the server is off. That is not automatically a fault. The comparison that matters is between the vendor's stated powered-off behaviour, the first powered state and the event log.
Start one evidence record per chassis
Create a folder or controlled asset record named with the chassis serial number and planned hostname. Put every screenshot, log export and command output inside it. For a multi-node order, do not use one folder named new-servers.
A simple record can contain:
| Evidence | Suggested file | | --- | --- | | Delivery identity | 00-delivery-record.pdf | | BMC state before power | 01-bmc-before-power.pdf | | Event log before power | 02-sel-before-power.txt | | POST capture | 03-post-notes.txt | | BMC inventory after boot | 04-bmc-inventory.json | | Sensor snapshot | 05-sensors-after-boot.csv | | Linux inventory | 06-linux-inventory.txt | | Exceptions and decision | 07-first-boot-result.md |
Keep passwords, recovery keys and private management addresses in the approved secrets or asset-management system. Evidence packs are often shared with suppliers; they should not become credential stores.
Power on while watching POST
Use the model's documented start method. That may be the physical power button, BMC power control or an installation workflow run by an authorised service engineer. NVIDIA's DGX B200 documentation, for example, allows power-on through the physical button or remote BMC, but its installation and first-boot work is assigned to NVIDIA partner personnel or field service.
Start the console capture or written timeline, then apply host power once. Do not issue repeated power-cycle commands because the console looks quiet for a few seconds. Dense GPU servers may spend time on memory training, PCIe discovery, storage initialisation and fabric bring-up before the boot device appears.
Record:
- the local time when power-on was requested;
- front-panel power and fault LED behaviour;
- POST codes or messages in sequence;
- any automatic reboot;
- the time at which the boot loader or login prompt appears;
- the final BMC health state.
NVIDIA documents a flashing power LED during POST on DGX B200 and recommends allowing up to one minute of idle time after the login prompt so components can finish initialising. Do not apply that timing to every vendor. Use it as an example of why an apparently slow transition is not enough reason to interrupt boot.
Stop and escalate if you see smoke, arcing, liquid, a burning smell, a physically abnormal power connector or any condition covered by the site's emergency procedure. Use qualified electrical and facilities staff for power faults. This guide does not replace electrical safety rules.
Also stop the commissioning sequence, without opening restricted assemblies, when the server repeatedly resets, the fault LED remains active, POST reports a hardware failure, a power supply shows a fault, or the BMC records a new critical event. Capture the state before changing anything.
Read POST as evidence, not decoration
POST tells you where firmware stopped, but a code rarely explains the whole cause on its own. The same visible symptom can follow a DIMM-training problem, an adapter that failed to initialise, a boot-order issue or a vendor-specific firmware condition.
If POST fails:
1. note the last stable screen, code and timestamp; 2. save the BMC event log and POST-code log; 3. capture the current sensor page and power-supply status; 4. compare the code with the exact platform manual; 5. open a supplier case before reseating parts or changing firmware.
Avoid speculative fixes. Moving a GPU, clearing CMOS or changing BIOS defaults may alter the evidence and can breach the supported service procedure. If the supplier authorises a change, record who authorised it, what changed and the result of the next boot.
Check BMC sensors after the host reaches idle
Once the system reaches its login prompt and the vendor's stated initialisation period has passed, return to the BMC sensor view. Save the readings before running a workload.
Look for presence and status, not a universal temperature target. A newly powered idle system should report its expected fans, power supplies, processor and DIMM temperatures, voltages and chassis state. Exact values depend on inlet temperature, firmware policy, cooling design and hardware generation.
Investigate:
- a missing sensor that the same platform normally exposes;
critical,failed,non-recoverableor similar states;- a fan reported absent or stopped outside a documented standby mode;
- one power supply missing from a redundant pair;
- an inlet or component temperature outside the manufacturer's stated range;
- a voltage or current event that appeared at power-on;
- repeated entries that advance while the system sits idle.
A loud fan ramp during POST can be normal. A fan bank that never settles may indicate a missing cover, absent sensor, firmware condition or cooling fault, but sound alone is not a diagnosis. Use the sensor record and platform manual.
Compare BMC inventory with the order
Modern BMC interfaces may expose processor, memory, storage, PCIe, GPU, PSU and FRU inventory. NVIDIA's DGX B200 BMC, for example, lists system inventory, GPU information, sensors and several log types. Redfish provides a standard API shape for systems, chassis, managers, sensors, logs and firmware inventory, although each vendor decides which resources and OEM fields it implements.
Export the available data rather than relying only on screenshots. Redfish JSON, vendor support bundles and CSV sensor exports are easier to compare across a cluster.
Build a reconciliation table:
| Component | Ordered | BMC/firmware sees | Operating system sees | Result | | --- | --- | --- | --- | --- | | CPUs | model and count | value | value | pass / hold | | Memory | total and population | value | value | pass / hold | | GPUs | model and count | value | value | pass / hold | | Boot drives | model, count, RAID intent | value | value | pass / hold | | Data drives | model and count | value | value | pass / hold | | NICs | model, speed and port count | value | value | pass / hold | | PSUs | count and redundancy | value | not applicable | pass / hold |
Keep unknown distinct from missing. A BMC may not expose a device even though firmware and Linux see it. That is an observability gap to record; it is not proof that the hardware is absent.
Capture a Linux hardware inventory
If the server arrived with a supported operating system, log in through the approved console or management path. Do not install drivers or change BIOS settings until the first inventory has been saved.
The following commands are useful on many Linux distributions. Check the installed tool versions and your organisation's privilege policy before running them:
``bash date --iso-8601=seconds hostnamectl lscpu free -h lsblk -e 7 -o NAME,MODEL,SERIAL,SIZE,TYPE,FSTYPE,MOUNTPOINTS lspci -Dnn ip -br link ip -br address sudo dmidecode -t system -t baseboard -t processor -t memory sudo journalctl -b -p warning..alert --no-pager sudo dmesg -T --level=err,warn ``
Save the output to the chassis record. Serial numbers and MAC addresses are operational data, so keep the file private.
lspci lists devices on PCI buses and can show the bus tree with lspci -t. Its machine-readable formats are better for automated comparison than parsing the ordinary display. dmidecode reports firmware-provided DMI data; treat that as manufacturer-supplied inventory, not an independent physical measurement. lsblk shows block devices, while lscpu summarises the CPU topology that Linux sees.
Check the facts that affect later work:
- both processors appear when two were ordered;
- usable memory is close to the expected total and no DIMM bank has vanished;
- every planned boot and data drive appears at the correct size class;
- each physical NIC and port appears, including high-speed adapters;
- the PCIe list contains the expected GPU-class devices and switches;
- the boot log has no unresolved hardware, IOMMU, PCIe, memory or storage error that repeats.
Do not dismiss a warning merely because the login prompt appeared. Equally, do not treat every firmware or kernel warning as a failed server. Save it, identify the component, check the vendor guidance and decide whether it blocks the next stage.
Check GPUs before and after the driver boundary
Before a vendor driver is installed, Linux can still enumerate a GPU as a PCIe device. A basic check is:
``bash lspci -Dnn | grep -Ei 'NVIDIA|AMD|VGA|3D controller|display controller' ``
Count the expected devices and save their PCI bus addresses. On systems with switches or bridges, lspci -t helps show the path from CPU root ports to devices.
If a compatible NVIDIA driver is already part of the factory image, add:
``bash nvidia-smi -L nvidia-smi --query-gpu=name,uuid,pci.bus_id,vbios_version,memory.total --format=csv ``
NVIDIA recommends UUID or PCI bus ID for stable identification because enumeration order can change across reboots. Save those identifiers now; they become useful when a scheduler, container platform or monitoring system is added later.
An nvidia-smi failure at this stage does not automatically prove a dead GPU. The command depends on a loaded, compatible NVIDIA driver. Separate these outcomes:
- the GPU does not appear on PCIe;
- it appears on PCIe but the driver is absent;
- the driver loads but cannot initialise one or more GPUs;
- every GPU initialises and reports the expected identity.
That distinction prevents a software packaging problem from being logged as hardware damage. The same principle applies to AMD accelerators: PCIe enumeration comes first, then the supported vendor software stack and management tool.
Check storage without changing it
First boot is not the moment to repartition every drive. Record the delivered state before changing RAID, filesystems or mount points.
Confirm the boot device, drive count, model, serial and capacity. Compare hardware RAID or BMC storage inventory with lsblk and the operating-system logs. A drive hidden behind a RAID controller may not appear as an individual block device in Linux; use the supported controller tool for the second view.
Some factory images start a RAID mirror rebuild after first boot. NVIDIA notes that DGX B200 software RAID can rebuild for about an hour after imaging, temporarily affecting performance and producing a health warning. Do not mistake documented resynchronisation for a failed benchmark, and do not start performance testing until the rebuild has completed.
Check network identity before joining production
List every interface and MAC address, then map the operating-system names to physical ports and the build sheet. Interface names such as enp129s0f0np0 are derived from topology; they are not a substitute for a labelled port map.
Keep the BMC network separate from host data interfaces. Configure only the minimum host address needed for commissioning, and avoid plugging every high-speed port into the production fabric until the mapping is known. An unexpected duplicate address or swapped storage/fabric link can create a wider incident than a failed first boot.
For a cluster, use the same interface table on every node. Differences may be intentional, but they should never be accidental.
Decide whether the server passes first boot
Pass the first-boot gate when all of the following are true:
- POST completes and the server reaches a stable console or login prompt;
- no unresolved critical BMC event or fault indicator remains;
- expected CPUs, memory, drives, NICs, GPUs and power supplies are accounted for;
- sensor states agree with the platform documentation and site conditions;
- the boot and kernel logs contain no unresolved repeating hardware fault;
- the evidence pack is tied to the correct serial number and hostname.
Use hold when the server runs but one fact remains uncertain: a DIMM total differs, a NIC is absent, a PSU reports degraded redundancy, a sensor has no reading, or a log entry needs the supplier's interpretation. Do not erase the symptom by updating firmware or reinstalling the operating system before it has been captured.
Fail and escalate when the machine cannot complete POST, repeatedly resets, reports material damage or a persistent critical hardware event, or omits a component that the supplier confirms should be present. Follow the supported return or field-service process.
What changes for a multi-node delivery?
Consistency becomes part of the test. Use one collection script or command list across every node, but preserve node-specific serials, MAC addresses, GPU UUIDs and storage serials.
Compare structured outputs rather than screenshots. Differences in CPU count, memory total, PCIe device count, NIC firmware or drive layout should appear in a small exception report. Do not assume the odd node is faulty until you compare it with the build sheet; a cluster can contain intentional head, storage or spare-node differences.
Map each chassis serial to rack position, BMC address, hostname and GPU UUID set before orchestration software is installed. That mapping saves hours later when a scheduler reports node07 while the engineer standing at the rack can only see vendor serial labels.
What first boot does not prove
A clean first boot does not prove GPU memory health under load, PCIe performance, NVLink or NVSwitch operation, network throughput, storage endurance, thermal stability or application performance. Those belong to later diagnostics and benchmarking.
Do not publish a supplier-acceptance certificate from this evidence alone. First boot proves that the platform starts, reports a sane idle state and exposes the expected inventory. The next gates should cover firmware baseline, supported drivers, vendor diagnostics, fabric checks and workload-specific tests.
Where the buyer does not have secure management networking, lifting equipment, rack power or staff to run this process, GPUMachines Buy & Host provides an ownership route with colocation. The same evidence should still be produced; hosting changes who performs the work, not the need for a traceable result.
FAQ
How long should the first boot take?
There is no safe universal figure. Memory training, PCIe discovery, storage initialisation and platform firmware can make the first boot slower than later starts. Use the model manual and BMC POST log. Capture a stalled code before deciding that the server has hung.
Should we update BIOS or BMC firmware before collecting inventory?
No. Save the delivered firmware versions, logs, sensors and inventory first. Then compare the installed versions with the vendor's supported baseline and follow the approved update procedure. Updating first destroys useful evidence about the delivered state.
Is PCIe enumeration enough to accept a GPU?
No. It proves that the host can see a PCIe function. Driver initialisation, vendor diagnostics, memory checks, fabric validation and load testing provide later evidence about health and performance.
Should the system event log be cleared before first boot?
Export it first. Clearing can remove factory, transport or installation evidence. If the vendor asks you to clear the log for a controlled retest, record the export, authorisation and exact time.
Can first-boot command output be sent to a supplier?
Usually, but review it first. Serial numbers, MAC addresses, hostnames, IP addresses and usernames may be present. Share only what the support case needs through the approved channel.
Sources and further reading
- NVIDIA DGX B200 User Guide: first boot setup
- NVIDIA DGX B200 User Guide: BMC sensors, inventory, logs and remote control
- NVIDIA DGX B200 User Guide: quickstart, start-up and shutdown guidance
- NVIDIA DGX B200 User Guide: Redfish inventory, telemetry and log examples
- DMTF Redfish schema index
- ipmitool project: sensors, FRU information, chassis state and system event log
- PCI Utilities: lspci manual
- NVIDIA System Management Interface documentation
- dmidecode project documentation
- Linux lsblk manual